This post was originally published here
In my last blog post – Logic Apps and DocuSign integration – I explain how you can create and dynamically populate a contract using an HTTP input and then use the DocuSign connector to complete the workflow! Today we are going to see another DocuSign integration capability.
By default, and as I mentioned in my last post, once the document is completed and signed by both parties, all participants will receive an email informing them that All signers completed Complete with DocuSign and with an available link for them to access and view the document.
However, the signed document will live and will be available on the DocuSign platform, which is probably not ideal, typically, we would like to store it internally, if it is personal, in our local drive or dropbox, in an organization inside SharePoint or CRM for example.
So, the main questions are: Is it possible to automate this part of the process? and if yes, how?
And yes, it is possible, and this is what we will address in this blog post! For simplicity, we will be using Dropbox as our archive system.
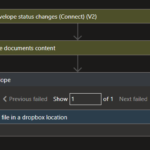
Before we start to explain all the steps you need to do to implement this logic, let me tell you that what you usually expect to see in the Logic App workflow will be typically like this:
Where the:
- Logic App will be triggered once the status of the envelope change to Completed.
- From there, we will make an additional call to Get the envelope documents’ content.
- And then create a file on Dropbox.
- That will create a for each action since the structure of the response is an array despite only containing one row.
I don’t like this approach for several reasons:
- We are making an unnecessary external call to DocuSign – the Get envelope documents content call.
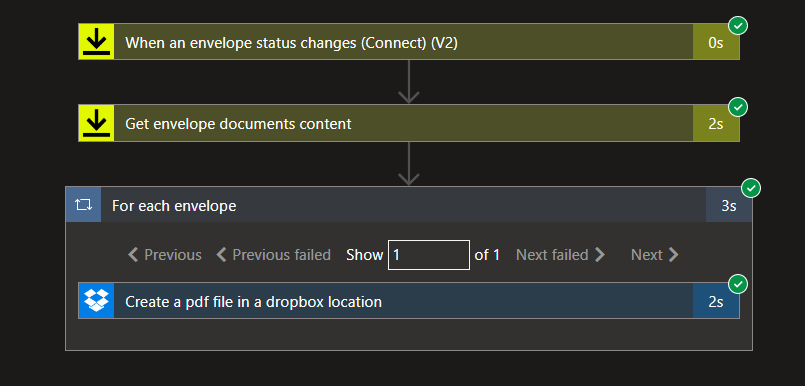
- It is less performant. The processing time of the Logic App can go from 3 to 5 seconds:

We can do way better! and do the same in less than 2 seconds. So here we are going to explain the “intermedium” approach. For simplicity, I won’t implement the “advanced” approach that only contains two actions!
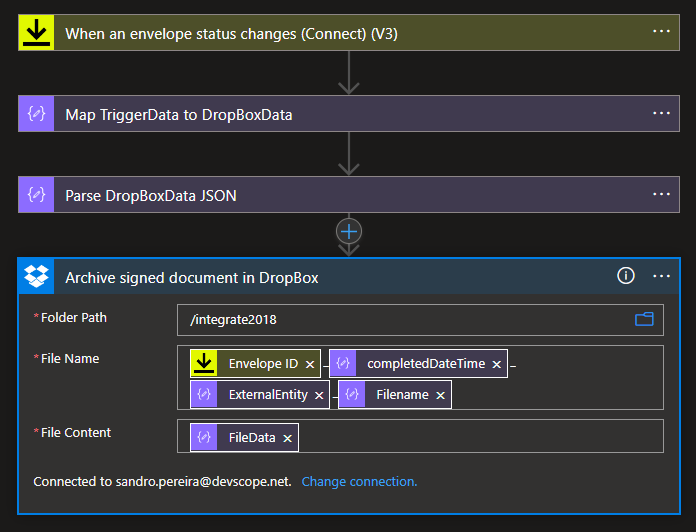
So, to archive a signed document, what we need to do is:
- Create a new Logic App, let’s call it: LA-ProcessDocuSignSignedDocuments-POC.
- On the Search connectors and triggers box, type DocuSign, select the DocuSign connector, and then select the When an envelope status changes (Connect) (V3) trigger.
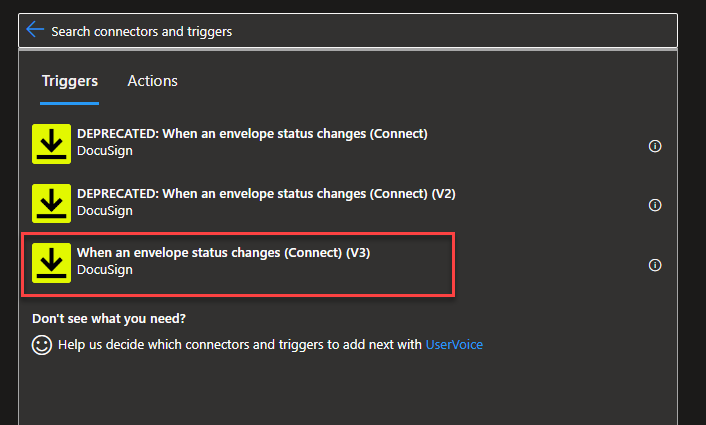
- On the When an envelope status changes (Connect) (V3) trigger, we need to:
- On the Account property from the combo box, select the account to use.
- On the Connect name property, type a name that correctly describes your connector, for example, Process Document Signed.
- On the Envelope Status property from the combo box, select the envelope-completed option.

Note: if you use V2 of this action, the Envelope event property value will be Completed and not envelope-completed.
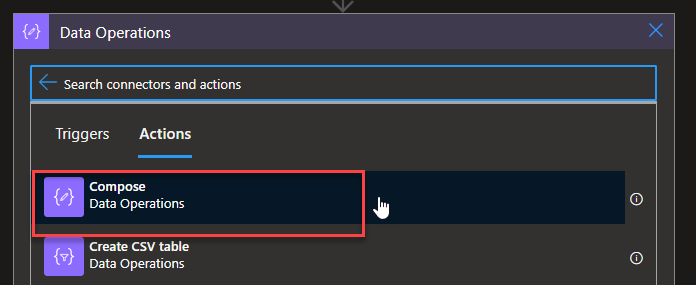
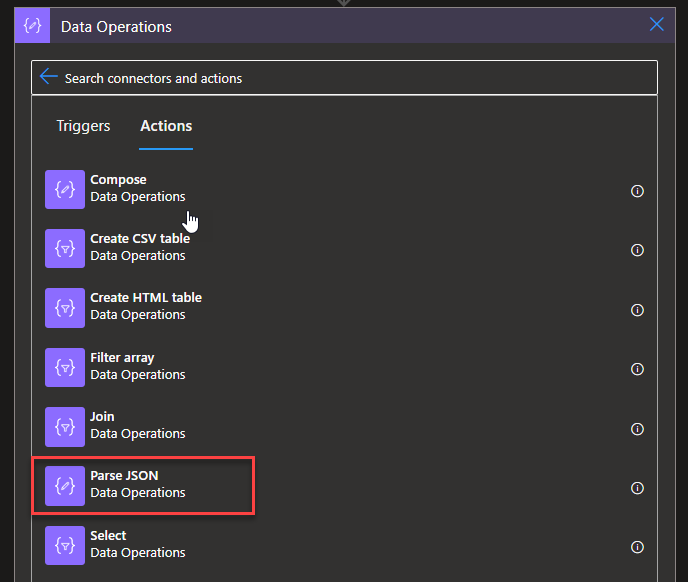
- Click on + New step to add a new action. From the search textbox, type Data Operations and then select Data Operations – Compose action.
- On the Compose action, we need to add the following input value:
{
  "ExternalEntity": "@{triggerBody()?['data']?['envelopeSummary']?['recipients']?['signers'][0]?['name']}",
  "FileData": {
    "$content": "@{triggerBody()?['data']?['envelopeSummary']?['envelopeDocuments'][0]?['PDFBytes']}",
    "$content-type": "application/pdf"
  },
  "Filename": "@{triggerBody()?['data']?['envelopeSummary']?['envelopeDocuments'][0]?['name']}",
  "InternalEntity": "@{triggerBody()?['data']?['envelopeSummary']?['sender']?['userName']}",
  "completedDateTime": "@{triggerBody()?['data']?['envelopeSummary']?['completedDateTime']}"
}
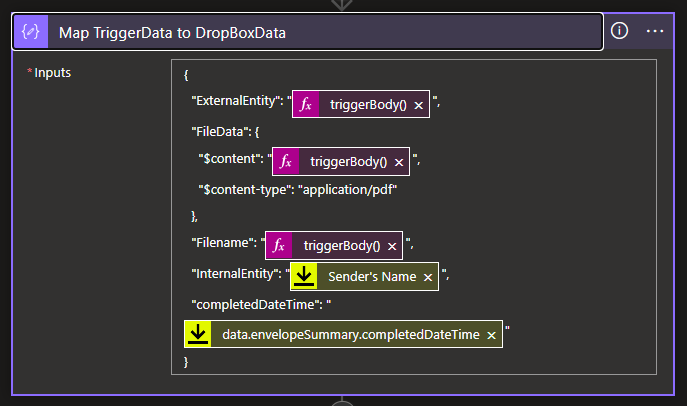
Here, we are extracting only the necessary pieces of information that the trigger will provide to us and creating a simple JSON message with all the information we will need to create the file in our Dropbox according to the rules we specify. For example:
- The expression triggerBody()?[‘data’]?[‘envelopeSummary’]?[‘recipients’]?[‘signers’][0]?[‘name’] will contain the name external entity/person that signed the document.
- The expression triggerBody()?[‘data’]?[‘envelopeSummary’]?[‘sender’]?[‘userName’] will contain the name internal entity/person that signed the document – in this sample, my name.
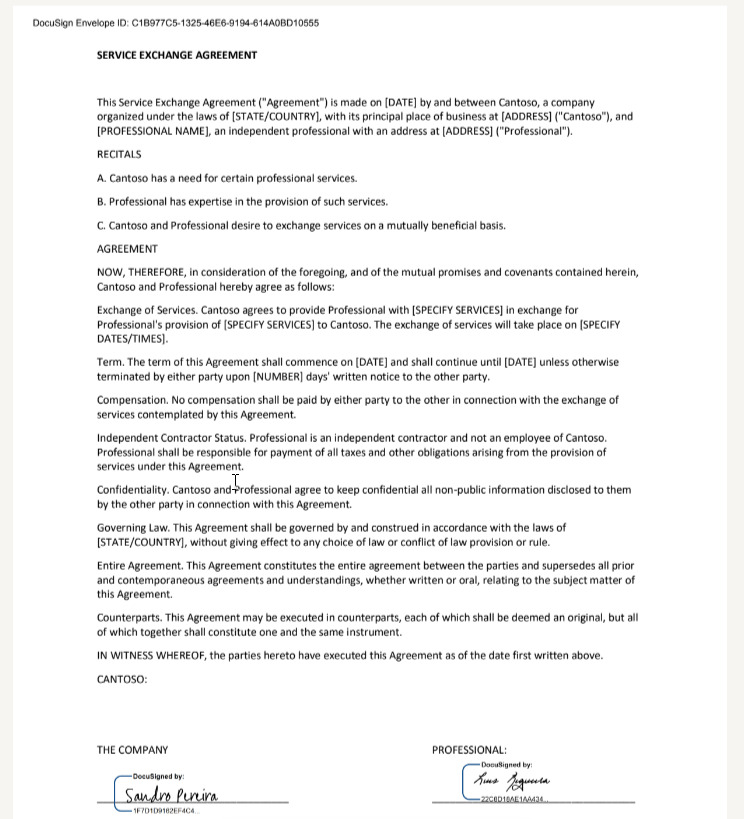
- The expression triggerBody()?[‘data’]?[‘envelopeSummary’]?[‘envelopeDocuments’][0]?[‘name’] will contain the original name of the file we add on DocuSign – in our case, SERVICE EXCHANGE AGREEMENT.pdf.
- The tricky part was the File data to be added to the Dropbox. If we send only the bytes that are available on the PDFBytes property, a file will be created on our Dropbox, but it will be corrupted, and we cannot open it. So we need to create a structure with content type and content information.
Now, continue our Logic App workflow. Let us:
- Click on + New step to add a new action. From the search textbox, type Data Operations and then select Data Operations – Parse JSON action.
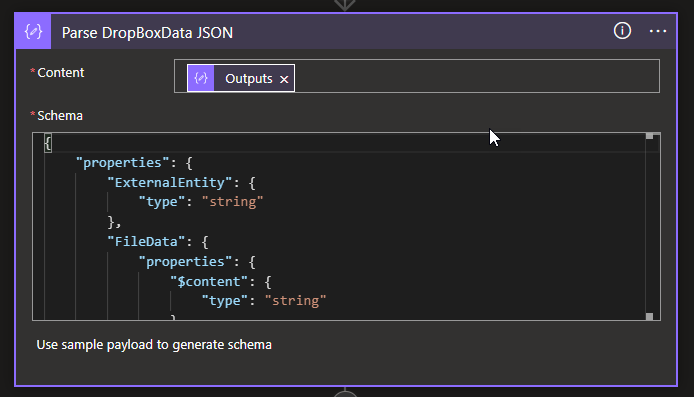
- On the Parse JSON action, we need to:
- On the Content property, set the value to the Output property of the previous Compose action, in our case, the Map TriggerData to DropBoxData.
- On the Schema property, set the following schema:
{
    "properties": {
        "ExternalEntity": {
            "type": "string"
        },
        "FileData": {
            "properties": {
                "$content": {
                    "type": "string"
                },
                "$content-type": {
                    "type": "string"
                }
            },
            "type": "object"
        },
        "Filename": {
            "type": "string"
        },
        "InternalEntity": {
            "type": "string"
        },
        "completedDateTime": {
            "type": "string"
        }
    },
    "type": "object"
}
Note: This will tokenize the properties of the JSON message we created earlier, and that will allow us to easily used them in the following action.
Note: these two actions, the Compose, and the Parse JSON, are optional. We could not use them and configure all the properties of the next action with expressions – this will be the “advanced” approach!
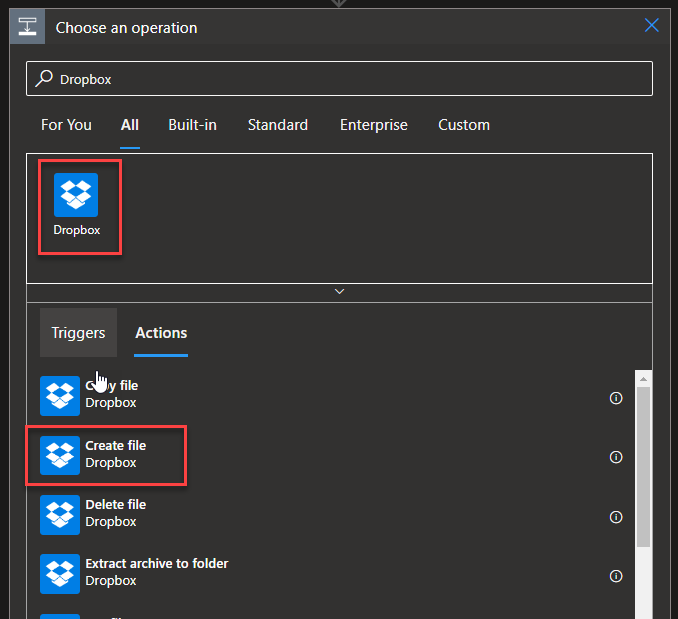
- Click on + New step to add a new action. From the search textbox, type DropBox and then select Dropbox – Create file action.
- On the Create file action, we need to:
- On the Folder Path property, define the path inside dropbox to where to store the file.
- On the File Name property, we want the file to have the following naming convention:
- ___
- So for that, we need to define this property with the following expression:
- @{triggerBody()?[‘data’]?[‘envelopeSummary’]?[‘envelopeId’]}@{body(‘Parse_OneDriveData_JSON’)?[‘completedDateTime’]}@{body(‘Parse_OneDriveData_JSON’)?[‘ExternalEntity’]}_@{body(‘Parse_OneDriveData_JSON’)?[‘Filename’]}
- On the File Content property, set the value to the FileData property of the previous Parse JSON action, in our case, the Parse DropBoxData JSON.
- Finally, save your Logic App.
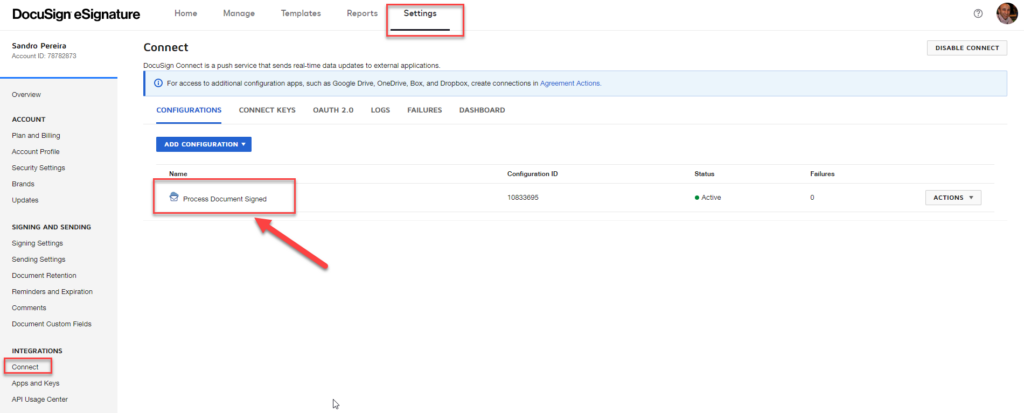
By clicking saving, this will also create in DocuSign platform a Connect configuration with the name you used on the trigger, in our example, Process Document Signed. You can see this by:
- Entering your DocuSign account.
- On the top menu, select Settings. From there, in the left tree, select the Connect option under Integrations.
Now, for these “intermedium” and “advanced” approach to work we need to do a small trick on the connection inside DocuSign. To do that, we need to:
- Select the Process Document Signed connection.
- On the Edit Custom Configuration page, scroll down to the option Trigger Events under Event Settings, and expand the Envelope and Recipients panel.
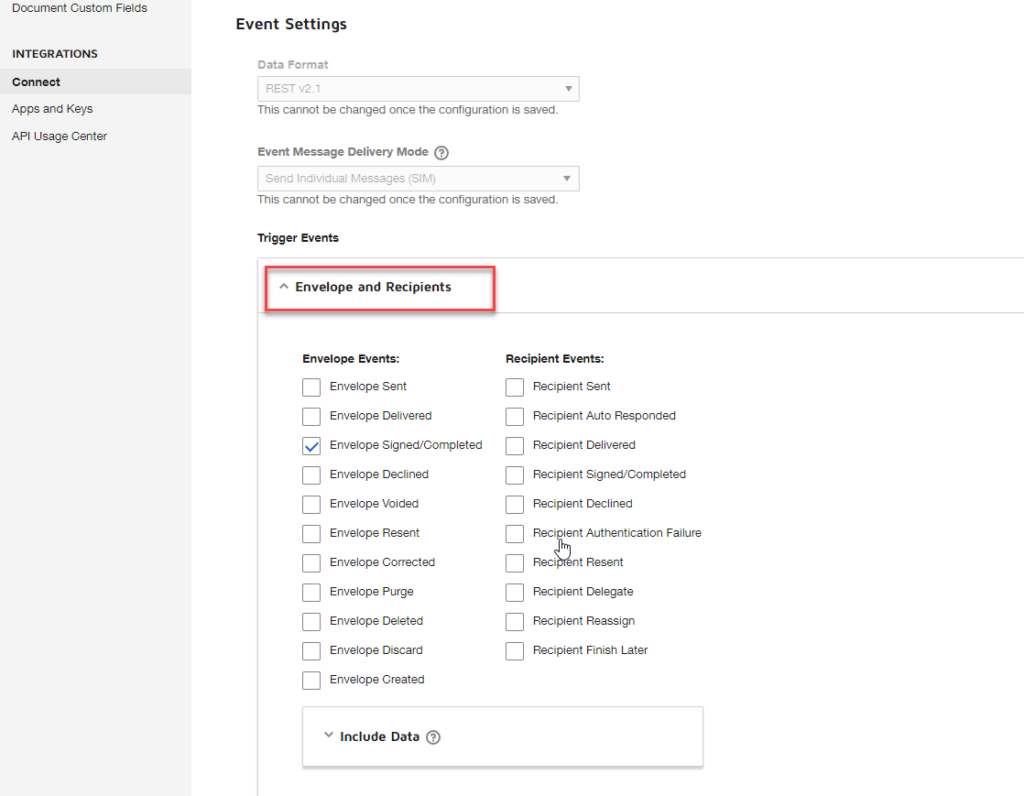
- And then expand the Include Data panel and make sure you select the following options:
- Custom Fields
- Documents
- Extensions (optional)
- Recipients
- Tabs (optional)

- Click Save Configuration in the top right corner on the Edit Custom Configuration page
Now to test it, we need to start by executing the Logic App we create yesterday, in order to generate a new document (aka envelope) to be signed.
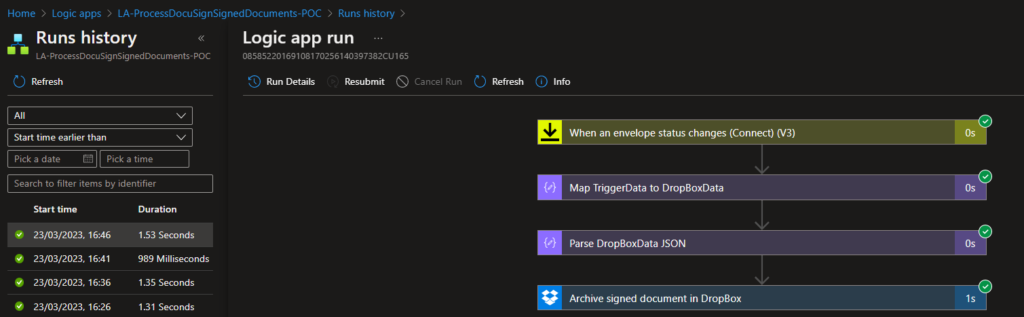
Once both parties sign the document, our Logic App will be triggered:
And a file will be added in our Dropbox:
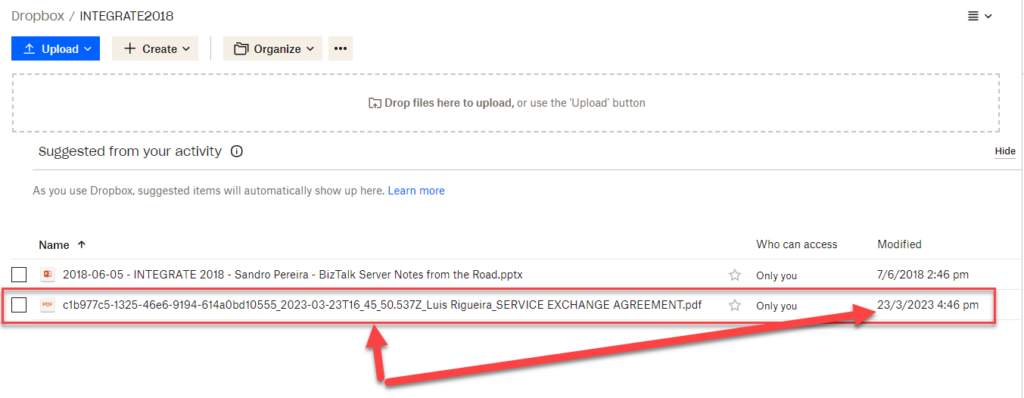
And, to be sure, if you click on it, you will the the document signed by Luis and me.
Now, have you notice on the picture above the execution time of this approach? All of them in less than a 2 seconds!
Credits
Once again, a big thanks to my team member Luis Rigueira for participating in this proof-of-concept!
Hope you find this helpful! So, if you liked the content or found it helpful and want to help me write more content, you can buy (or help buy) my son a Star Wars Lego!
